![4 Color_Transparent_Horizontal_Canal Logo (1).png]](https://help.canalinsurance.com/hs-fs/hubfs/4%20Color_Transparent_Horizontal_Canal%20Logo%20(1).png?width=200&height=80&name=4%20Color_Transparent_Horizontal_Canal%20Logo%20(1).png)
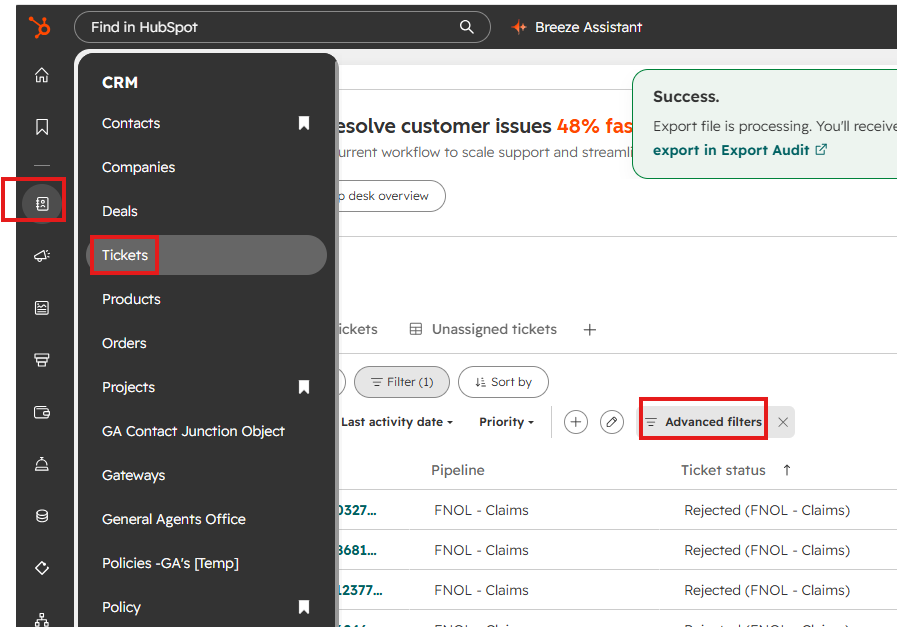
1. Open the Tickets workspace
In HubSpot, open CRM from the left navigation and select Tickets. Confirm the ticket pipeline selector is set to FNOL - Claims.
2. Apply the rejected-ticket filters
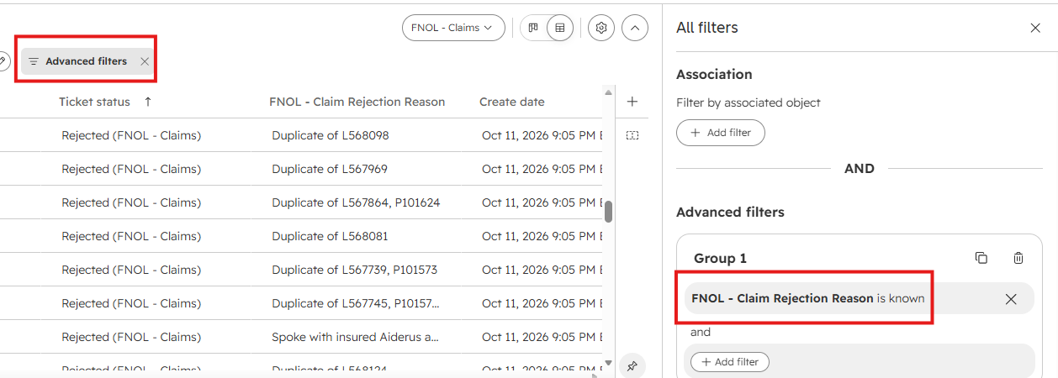
Select Advanced filters. In Group 1, add “FNOL - Claim Rejection Reason is known.”
3. Select every matching ticket
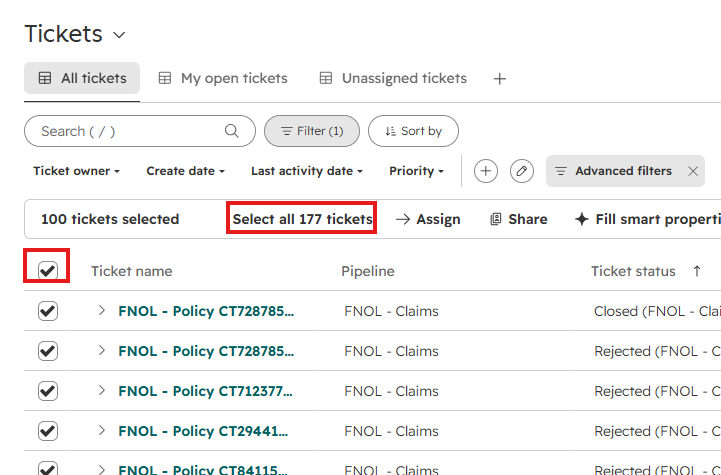
Select the checkbox in the table header. HubSpot initially selects the records on the current page. If the banner offers “Select all [number] tickets,” select that link so the export includes the full filtered result set, not only the first page.
4. Start the export
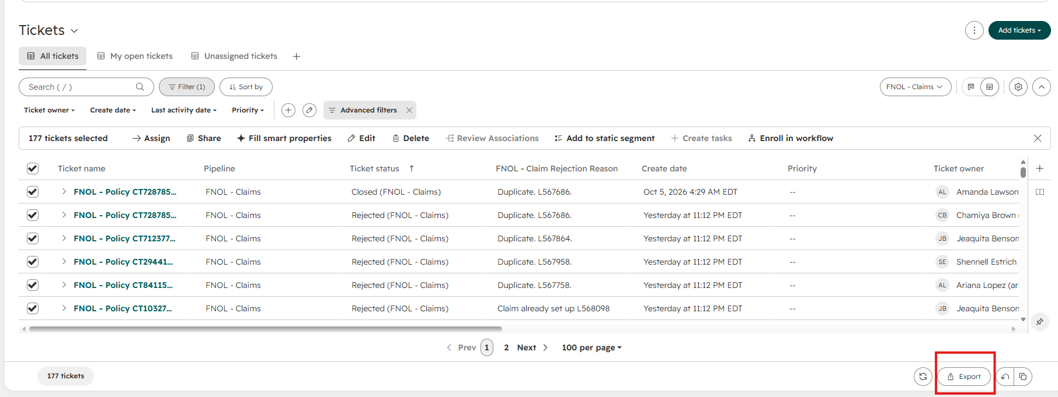
Confirm the selected-record count reflects the full filtered result set. Select Export in the lower-right corner of the ticket table.
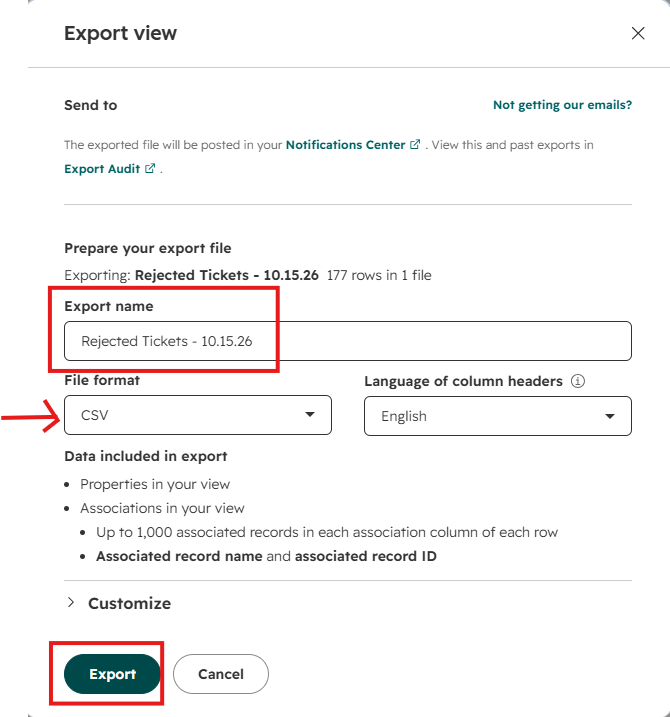
5. Configure the export file
In Export view, enter a clear export name that includes the run date, such as “Rejected Tickets - MM.DD.YY.” Set File format to CSV and leave Language of column headers as English. Select Export.
6. Verify submission and retrieve the file
Confirm that the green Success message appears. The message states that the export is processing, and that an email and HubSpot notification will be sent when the file is ready. Retrieve the completed file from the Notifications Center; prior exports can also be viewed in Export Audit.

Link to Process video: Exporting Rejected FNOL Tickets